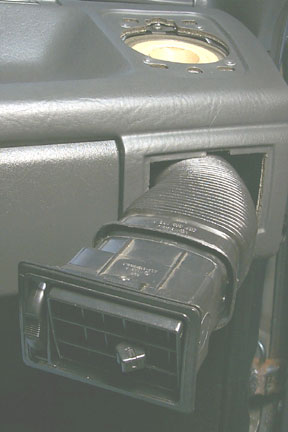
Voxwagen
Speaker Install

Front Speakers Rear Speakers
Door Speakers Passenger Speakers


In January 2004, the speakers in the car had pretty much stopped working. And although the exhaust note is very pleasant and entertaining, there are times the drive calls for tunes and times the drive needs the radio to see if there is a reason the traffic hasn't moved in the last 20 minutes. The time to replace the speakers had come.

The goal was not to build a wumpa wumpa car that would be competing in spl contests but to have functioning speakers in the factory locations. The cleanest of installs.
Rear Speakers
Working Back to Front
I started with the rear speakers as their accessibility promised an ease of installation the front speakers simply do not offer.
The rear speakers in my Fox wagon are mounted on the shelves that hold the cargo area tonneau cover in place.

The speaker grill does not pop off from the top. It is a part of the speaker mounting system. The bolts that hold the speaker in place are molded into the grill.
Undoing the 7 mm nuts to drop the speakers also unbolts the grill. Once the speakers are clear of the bolts the grills can be lifted off.

In order to use the factory grills and keep that clean look the speaker mounting holes had to be made larger. This involved a dremel tool and some time.

Surprise!  The hole may be 4x6 but the speakers were 4 inch round on a 4x6 metal base.

Old Rear Speakers
As the new speakers were quite different in shape than the old ones, a gasket was  made out of "Brown Bread" to ensure a good seal between the speaker and the shelf.
The speaker wire terminals had to change from the funky factory ends to more common disconnects. The wires seemed more that adequate for my purposes.

With every thing back in, the set up looks just like the stock set up.

This all took only two trips to the hardware store. One for the disconnects and one for the proper crimping tool. The hatch only slammed down on my shin once while I was lying on my back in the back. All in all pretty smooth. Not bad for the third set of car speakers I had ever installed. They were good practice for what was ahead.
Front Speakers
Trouble Ahead

The front speakers were a bit more bother than the rears. Access is not obvious.

Speaker

Removing the grill reveals the problem.

Speaker

The speaker is mounted below the dash. Four rivets, two screws and no obvious way to get the speaker out.

The secret is that the speaker comes out the heater vent below the speaker.

The first step is to undo the screw at the top of the vent.

Screw at top

Gently pry up on the latches on the bottom of the vent and pull the grill out so it is just free of the dash.

Pry up

It is attached to a flexible hose.
Reach up underneath the dash and disconnect the other end of the flexible hose.
On the driver's side this is simple. On the passenger side this task seems daunting.
The car has a couple of CPU's and their associated harnesses and heat sinks in the way.
I tried chopsticks, pliers, a ruler, any thing. Nothing could reach and grab the hose.
Eventually, I just wiggled and then rammed my arm up and pulled the hose loose.
Surprisingly, I left very little flesh an no blood under the dash.

Vent and Hose Come Out

Now undo the screws holding the speaker in place.
Disconnect the wires.

Out with Old

Pull the speaker out through the vent hole.

Old front speakers

They are a lot like the rear speakers. A 4 inch round speaker mounted on a larger plate. Looking at this big plate and its holes, it seems unlikely that a regular four inch speaker will fit.

Old Front and 4

A bit of luck or perhaps geometry (perhaps this was planned by VW back in the day) allows the mounting holes of a 4 inch speaker to line up with the holes in the dash when it is turned 45 degrees.

Turn 4 inch
The "left" and " right" tabs or ears need to be removed. Many speakers come with easily removed ears. (No these are NOT the speakers I used. They are from a 1988 Fox wagon which had the speakers in the rear passenger arm rest area. Used here for illustration only.)

New speaker in

Here is the new speaker in place.
Installation is the reverse of removal. Almost.

The hole in the vent needed to be made larger for the new speaker to fit. Apparently, four inches is wider than it used to be. Be careful when making these slots. I used a file and just about removed too much material.
Tips
I should have run the file lightly around the edges of the vent to take off just the sharp edges. Would have saved a few scratches.
It was a lot easier to change the ends of the wires the factory speaker terminals to disconnects while they were hanging below the dash rather than trying to work on them through the vent and speaker holes.
After removing the tabs or ears from the new speakers, do take the time to file the rough edges  down. Then they won't try  to snag on the vent hole as they go through or scratch.

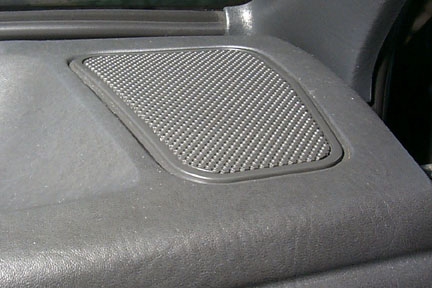
Once the grills were back in place, everything looked stock but sounded better.

Now I can listen to "Fox On The Run", while the Fox is running.

More and Bigger Speakers...

Door Speakers

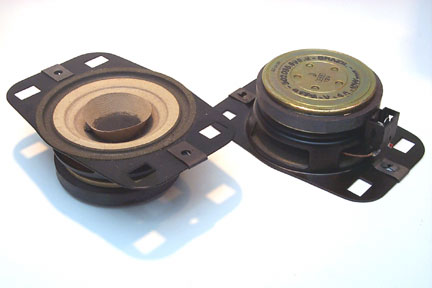
In January 2004 I replaced the stock speakers. In July of 2004 I wanted to make the sound bigger so I added some 5.25" speakers in the door and a 10" sub. I was never really happy with the install of the door speakers. It was my first non-stock location install and wasn't as clever as it seemed when I designed it. In November 2006, the record tying rainfall in the area caused the moisture barriers in the doors to fail. Having to redo the barriers gave me the chance to redo the speakers.

6.5 in door

When I pulled the door apart and had a good stare at it I noticed that I only needed to use about 20 of the holes in the door. That meant there were about 40 holes in it I didn't need. VW must have planned many variations in upholstry and options that never made it to North America. I used brown bread sound dampening material to plug the holes. It should help keep the water away from the door cards and definitely cuts down on the road noise. It also makes a nice seal between the door and the wooden panel holding the 6.5 inch speaker in the door.

Tip
A wooden spoon works pretty well as a tool to press the Brown Bread into the holes and get a good seal.
I had to use a longer screw on the window crank to allow it clear the bump caused by the new speaker grill.
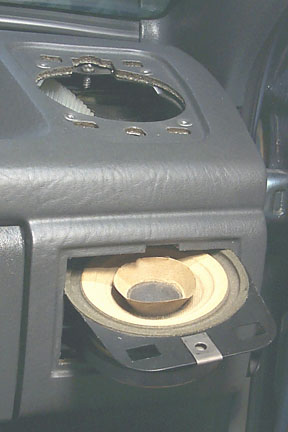
Rear Passenger Area Speakers
The first time I pulled the rear upholstry panels off, I thought to myself, "Wow, a fella could put a pretty big speaker in there."
Passenger Area
          Speaker

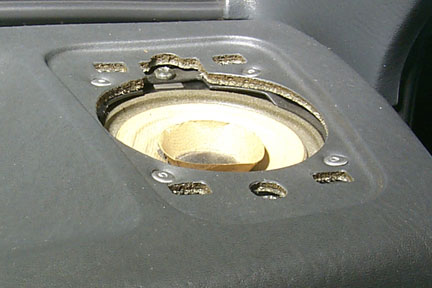
And if you didn't mind losing the ashtray you could probably put an 8 or 10 inch speaker in the hole.
I wanted to keep the ashtray as my daughter uses it as a caddy for the remote. 6.5 inch was about as big as I could fit.
Brown Bread seals the gap between the speaker panel and the car. 
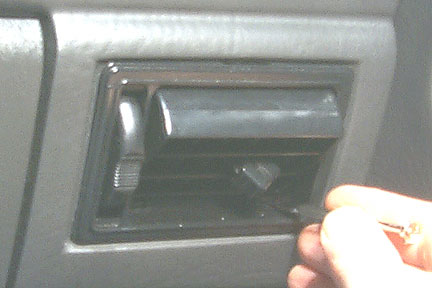
Acoustic weather stripping helps seal the holes around the ashtray and seatbelt cutouts.
The panel and sound dampening do cut quite a bit of road noise.

Looks Stock

With the panel back on it all looks stock. With less road noise and more SQ.
Tip
The factory VW upholstry clips are pretty much meant to be used once. They don't like to be taken on and off a bunch of times. I busted a couple every time I had to test fit a panel. And they are over two dollars a piece at the parts counter. I found that I could use the HELP! brand GM interior panel clip #245466 if I spent the time to trim about 1/4 to 3/8 inch off the head. They are quite a bit cheaper and don't seem to mind being pushed on and pulled off repeatedly.
Back to the Voxwagen Modifications Page

Back to the Voxwagen Timeline


Back to the Voxwagen Home Page